Wednesday, May 9, 2018

Oroshigane steel (7).....last bloom of the day


This day has been all about playing with fire. In keeping with that theme, as soon as the previous bloom was spark checked for approximate carbon content, it was popped back into the furnace. Actually, all of the blooms that I had made were added together to see if this Oroshigane melting hearth could handle the larger volume of steel.


The prior bloom looked to my eye as if the air blast was a bit strong, so for the start of this melt, I separated the air feed pipe a couple of inches to take things down a notch.


One other notable difference for this melt is that the first two melts of the day had used up the amount of charcoal that I had sized and screened (roughly ½-1”, no fines). For this melt I was throwing chunks of charcoal in bucket, crushing them carelessly with a hammer, and adding the entire mess into the furnace, fines and all. The third and last melt of the day ran longer than the first two, mostly due to the reduced air pressure and volume. With less air, the charcoal seemed to be filling up the chimney column more completely and felt like the fan was having a hard time pushing air through the increased quantity of fines. I let things run for about 30 minutes to get the blooms back up to melting temperature, then reconnected the air supply pipe.


The flame tending to shift from red to yellow is more dramatic in picture than in real life, but does seem to correspond to the melting state of the iron inside the furnace.


Well…….the higher air pressure had no problem clearing the fines, that's for sure, haha!


My favorite!


The huge bursts of sparks only last for a few minutes after each charge of charcoal has been added, but add greatly to the overall excitement! After the fireworks have abated, the flame looks a bit less dramatic.


If you stare at the flames too long though, they will sometimes stare back. Ellie says this flame is full of fire demons!


I ran the melt for about 30 more minutes (roughly 1hr total), then let the charcoal burn down to the tuyere before pulling the bloom. This one I like, bloom and picture both!


The camera can be a valuable tool in discerning what is going on during these high heat processes. I think that it shows a better differentiation that I can see by eye, maybe some increased IR ability, I don't know. The higher density of the iron/steel holds the heat much longer than the less dense slag. As with the other blooms, the mass is cup shaped, dramatically so. A small amount of slag would ideally be sitting on top of the developing steel bloom, but in this case is getting blasted off the top and onto the far wall of the furnace.


I quench the bloom and pick out the small fragments of entrapped charcoal bits before finally giving it a quick spritz of phosphoric acid to dissolve the black oxides remaining on the surface. The original air blast direction is away from the viewer, the small slag mass being the furthest away.


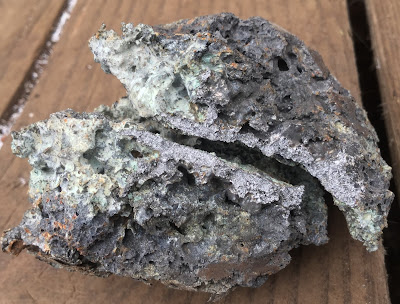
The bottom of the cup shaped bloom is a fascinating construct of small blobs and ribbons of iron. The tiny ribbons are bright, shiny and very flexible. You can bend then back and forth repeatedly without them breaking and they spark test as very low carbon iron.


They are also razor sharp, something that I didn't realize until the next day. “How in the hell did I get all these cuts on my hand!?”


The side view of the bloom opposite the tuyere seems to show a gradient of steel, iron at the bottom shifting to cast iron at the top.


This bloom would've been great to keep as is or to consolidate into a tighter mass, but instead of that, I smash it cold into fragments, to check out the grain structure of the iron/steel. I can make more, right?


The mass as a whole is very tough, odd considering that the steel grain structure should be huge, given the high and prolonged temperatures, but this thin section broke nicely.


Mostly rather nice and relatively small grain steel with a tiny bit of  iron showing the characteristic stranding we see in wrought iron. The darker gray areas outside the break spark as cast iron, with a very few short red sparks.


The higher heat of this final melt has put the end on a long afternoon of steel production. It isn't too clear in this photo, but the furnace wall has eroded back over 30 mm and the clay/charcoal tuyere is essentially gone. Large vitrified sections of the wall surrounding the highest heat areas have shattered and fallen away, presumably to end up as slag that was attached to the bloom.


First some furnace repairs, then more fun.

Monday, May 7, 2018

Oroshigane steel (6).....Still trying


The first round of iron melting in the Sumihira style Oroshigane furnace went so well, I just had to keep going. I used my last bit of bundle wrap wire during the first melt, but I still wanted to see how this furnace would handle a slightly larger mass of metal.


How about a remelt of last year's pseudo-successful “Aristotle” run? If you look closely, you can see the remains of the partially melted feedstock still stuck to the mass of the bloom.


The original melt of this blob of metal took over two hours and resulted in no notable increase in the carbon content. The mild steel rebar bundle wrap that originally tested as low carbon came out looking very different, but the spark looked much the same (perhaps it was just surface decarburization; I should've cut and polished the interior, but didn't). The reason that the melt took so long was because during the burn, the area around the tuyere (air inlet) had quickly melted and was continually dripping down to block the airflow. Not enough air = not enough heat. It did make a nice, very dense bloom however.


Since the new furnace was already good and hot, I plopped the old bloom in at the bottom, then filled it with charcoal right to the top of the shaft. It only took a short while before the charcoal was fully burning with a sparse red flame.


The flame becomes more “solid” as the metal begins to melt.


The previous burn produced a bloom that looked burnt to me and had a significant amount of cast iron in the composition. This time, as the flame begins to shift slightly into the yellow flame stage, I briefly turn off the blower (the hateful air mattress inflator!) and give a listen to the fire. I definitely hear the iron “boiling”, so I turn the blower back on and refill the shaft with charcoal one last time.


As soon as the charcoal level drops to the level of the tuyere…….


…..it's time to check out the results. This time the melt took, at most, 15 minutes.


The thin gray mass on the left that is stuck to the bloom is the sacrificial charcoal/clay inner lining of the furnace, doing what it is supposed to; prevent the molten iron from sticking directly to the furnace itself.


And, the result.


Another cup shaped bloom. The air blast was travelling from the ball of my thumb towards the tip of my pinky finger, as it were. There is a small bit of furnace lining stuck to the bloom (on the left) where it had briefly adhered to the wall underneath the tuyere.


I like the appearance of this bloom better than the last, in any event. It looks like the force of the air blast was scouring the top of the bloom and throwing the small amount of slag against the wall.  Because this isn't a smelting furnace for reducing iron from ore, the slag is most likely from the slight amount of wall erosion around the tuyere.


The underside of the bloom has many globular masses that sparked as high carbon steel.


Looking into the furnace, you can see that the tuyere has eroded to be nearly flush with the wall of the shaft and there is evidence of spalling, as the walls vitrify and fracture off. You can also see the unstuck half of the sacrificial carbon/clay plate that the bloom sat upon.


The first two blooms from this furnace have been cup shaped in profile. I'm sure that someone with experience in these matters could tell in a moment what this says about the internal environment of the furnace is exactly, but I will need to do more experimenting. I suspect that that I've got the air blast set too high, but we will see.

Soon.

Friday, May 4, 2018

Oroshigane steel (5)..... using the sumihira style furnace

The Sumihira style furnace has been completed and drying for a few days…..it's time to take this bad boy out for a spin.


Remember that stubborn little stick of mild steel that we just couldn't melt, using the “Aristotle” furnace? Reverting back to the dread air mattress inflator makes reducing this iron into a blob of unrecognizable goo a breeze ( no pun intended... really!).


Starting out, flames are thin and red in color, with just a hint of blue at the base of the flame ( which you can't see here because the sun is too intense in Hawaii).


As the furnace comes up to melting temperature, the flame becomes much “thicker” and shifts towards a more orange color.


You also get a good view of my ghetto style blower motor, duct tape and all.


Knowing when to pull the molten bloom from the hearth is going to take me a bit of time and effort to get dialed in. Sumihira writes that as the process nears completion, the intensity of the flame will moderate some and also shift into the yellow spectrum. Then…..you turn off the noisy blower and listen. The molten steel will sound as if it's boiling.

If you think that it is about ready to come out, let the charcoal burn down until it reaches the tuyere, then turn off the air, grab a tool to hook out the bloom and…..


…..see what you got.


Looks like a burnt-iron cookie!


Another thing that I've been wondering about…...water quenching the bloom. In the handful of resources devoted to small scale iron smelting, YouTube, etc, when the raw bloom gets pulled from the furnace, the consolidation work begins immediately. The yellow-hot blob of steel is thrown onto a log or anvil, then gets gently pummeled by guys swinging sledgehammers. This squishes the odd protruding edges of the bloom into the concentrated center, consolidating the mass. The goal is to get the slag and other impurities out of the way as quickly as possible, resulting in a tight block of bloom iron or hearth steel.

In contrast to this, pretty much all of the Japanese resources on tatara ( the traditional large scale way to make steel) and Oroshigane show the hot bloom pulled from the fire and then immediately quenched into water. The bloom gets cleaned up, then returned to the forge for shaping and consolidation. Why would you not start working the bloom right away while it's still good and hot? Does the force of the water quenching blast off the slag and bits of charcoal stuck to the bloom?

Here's my chance to find out.


Fun, lots of boiling water and funny noises are produced, but as far as the resulting bloom is concerned, I'm not sure that the quenching does anything to tidy up the mass.

Rather ugly, this one.


I've seen lots of pictures of bloom steel and while this wouldn't be the ideally shaped result, it does display a commonly seen dished profile.


In this picture, the air blast would've been coming from the left. Please excuse the green strings of algae growing in my quench water, haha.


This entire process, from preheating the furnace to pulling the bloom from the fire used less than half of a 5 gallon bucket of hardwood charcoal, not a bad way to spend an afternoon. Even if you buy your charcoal in the store, that's still only a few bucks cost, a good deal even for a tightwad like myself.


The nice thing about performing an immediate water quench is that it makes the bloom available for spark testing right away. I sparked this little 1 lb. bloom but, try though I might, I couldn't get any decent pics as the sun was just too bright. Ahh…. the trials of living out in the open, haha. I'm grossly out of practice at interpreting carbon values by spark, but it looked to be a gradient of med/high carbon ( shortish yellow spark with strong bursts) ranging up to cast iron (very short red spark, sparse). A few bits tested low carbon, but the highest proportion looked to be cast iron.

This bloom would most likely be forgeable, given a high enough heat and a bit of patience. Fold and weld, fold and weld, and soon you would get a more homogeneous steel…….and I didn't do that. The melting of iron was so much fun that I immediately started in on a second melt, just to see if I could create a bloom with a more solid core. And larger, in anticipation of losing much of the total during the welding and blending phase.

One thing is certain though…..I need to be keeping better notes. Small changes in procedure seem to have large ramifications on the resulting steel. Go figure.