Ha! The project that just won't end! Man, talk about a poor choice of kanna to use as an example. This is turning into one of those "Here is what can go wrong" series. Of course, as luck would have it, the two planes that I fixed up this weekend would have been perfect..... If I had thought to take pictures. 20/20.
 |
| Easy peasy |
The naga-dai (large body joiner plane) has been sitting on my bench for about 6 months now, so it was high time to finish it. The 3mm groove plane is something I need for another project, so it got bumped to the head of the list. Either of these would have been much better choices for this DIY fixup series.
OK then..... Where were we? Oh yeah, wringing my hands over how to correct for this lopsided kanna blade.
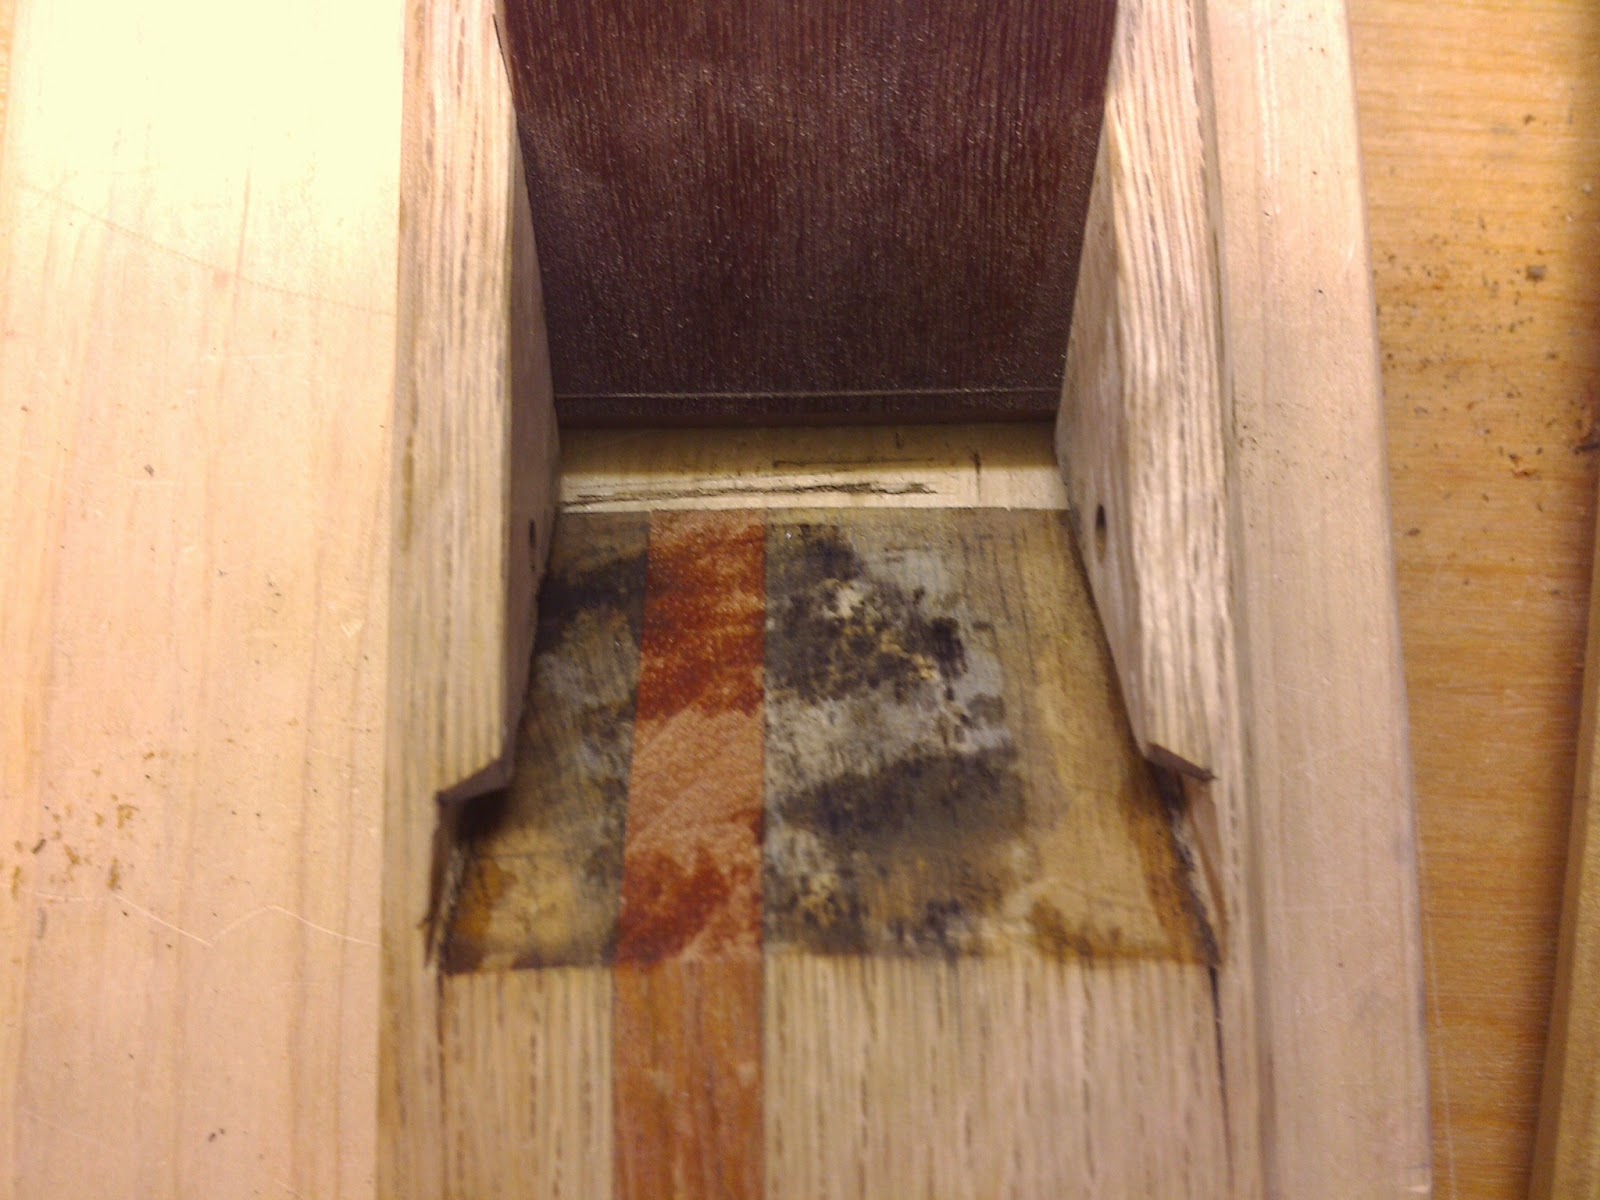
It doesn't look like much from this angle, but the blade is actually pretty skewed. What to do, what to do. I would like to trim the upper side of the left hand groove, bringing the blade up even with the right hand side. Unfortunately, that would make the blade very loose, necessitating a shim for the bed. That doesn't bother me, most of my planes have shims of some sort anyway, but.......
I decide to pretend that everything is just fine, and proceed as normal. Slowly though. Pure frustration, it's true, but I am kind of at a loss for good ideas. What's the worse that could happen?
It's time to fine tune the fit of the blade in the wooden body.
Rub thin oil on the back of the blade, then press the blade into place. The oily spots get scraped off using the tool of your choice.
Test fit. This is sighting down the sole, looking towards the back.
Un-freakin' believable! The blade is parallel to the sole!
That little, dark horizontal line is the blade protruding evenly, (almost) perfect as can be.
The blade is too wide, so I mark for the width of mouth.
And subtract a pinch. This will allow for a slight amount of lateral adjustment. I make the main blade just a hair narrower than the chip-breaker, using the chip-breaker as a gauge.
Just a pinch narrower.
The new plane looks small, next to the joiner.
It's time to trim the mouth insert. I do this by simply advancing the blade, shearing the insert. Naturally, the blade needs to be sharp and I use many gentle taps so as not to damage the blade.
Then I retract the blade. What you should get is an accurately defined surface that is planar to the face of the blade. Let's call it a cut line. Because this dai was initially cut poorly, the mouth insert will tapered. Now, if I was good at this, I would have foreseen this possibility and made the insert tapered. The tapered insert and the tapered mouth would cancel each other out, resulting in an even, straight (looking) insert.
*Smacks forehead repeatedly* "Stoopid! Stoopid! Stoopid!!"
Well, that is a bit excessive, maybe. This will work fine, unsightly as it is.
Right now the insert is a true zero clearance. I open it up, using chisels, files, and sandpaper on a stick.....whatever works. I backlight the mouth to check my progress, making sure that the mouth opening is as even as possible. As I get close to the final fit, I take a few test cuts. If the shaving clogs in the mouth, keep trimming.
An even gap, slighted along the blade. This is actually pretty tight. Any less and the shavings jam up.
The secondary blade is already matched to the main blade, it just needs to be fit to the retaining pin.
The chip-breaker was never fitted properly, so I replace the flimsy original pin with some frivolous bling. Again, keep things in alignment.
I decide to glue the insert into place. I use liquid hide glue, so the insert can be repositioned with the judicious application of heat and a few taps. I little dab will do 'ya.
I CAN'T TAKE IT ANYMORE! The protruding insert has to go! I use a flush cutting saw.
Time for a test drive (Finally!!).
CVG larch, very easy stuff. The plane pulls nice shavings, but I can't get anything close to super thin. Decent, but not great.
I'm not sure what the problem is. It's probably a combination of things, but most likely the uneven blade bed is to blame. The blade fits tightly, but the fit matching the blade to the bed is uneven, which can contribute to chatter and poor control of the cutting depth. Also, the pull of the plane is heavier than it's weight would suggest. This plane is quite a bit smaller than what I have been using lately, so it might just be a matter of a lesser mass and reduced momentum.
It's funny........ 1 year ago, I would have been stoked to have a plane that performed this well. Now I feel a bit ho-hum. In any event, dinner is getting cold (Oh wait, I'M supposed to be cooking! CRAP!!), and my patience is at an ebb.
Later, dudes..,.


No comments:
Post a Comment
Like all of us, I am figuring this out as I go, so when you see something that is incorrect or flat out wrong (and you will!), let me know. This is a learning process. Real people and names, please. Constructive comments and questions are very welcome, but hate speak/politics are not! Life (get one!) is too short.
Thanks, Jason